Monday, December 17, 2012

So we have these friends...

You may recall this pic...

circa 2005--at our wedding rehearsal dinner

All six of us went to the same college. 


Us girls were teammates...

Cathi & me                                              Allison & Cathi                                                me & Allison


Our boyfriends became friends b/c either (a) they traveled to our games/ meets together or (b) they were roommates at one time or another.


In a nut shell, we all became friends in college, got married, and each had 2 kids around the same time (not planned at all btw)...

March 2011


It still baffles me how that all worked out without even talking about it...


We've been able to live {somewhat} close to each other and make it a priority to get-together a few times a year if we can. 

It's amazing how much life can change after college. 


And it's so cool to see how this group of friends has remained close after all these years. 

We just got back from a cruise this past week (which I'll post on tomorrow). Just the six of us without our kids, acting as MUCH like kids as we possibly could.


It was a trip we'll never forget.

God is so good.

***

Friday, December 7, 2012

Holiday snapshots...

I use this blog as a scrapbook at times (unless FB starts making THAT an option).

Anyway, we're having some holiday fun over here!


After telling the kids the story of baby Jesus, they decided to see what sleeping in a manger would feel like. The idea was instigated by Kensie, but Mason quickly followed his big sister. So they each grabbed a basket, stuffed it with blankets and squeezed they're little bodies in there like sardines.


It was quite adorable to watch and it totally melted this Mama's heart. 


We've also been busy Christmas shopping this week. They are both super troopers when it comes to shopping. I always pack Mason in the stroller with lots of snacks and toys, so I'm sure that helps. Kensie will usually skip cheerfully alongside the stroller browsing the aisles with me. She's developed this funny little habit of calling me by my first name when we're out shopping....

"Look at this pwetty dwess Shaaannnon!"

"Oooooooo, Shaaaannnnon. Look at deese spawkly shooooes!"

I seriously have no idea how that happened, but it cracks me up every time.. This is the only time when she calls me anything but Mama--so I play along.


We were able to see Santa today. We showed up at noon (when the sign said he'd be back). Welllll, he was late. Forty five minutes late. We hadn't had lunch yet, AND it was getting close to naptime.


Can you guess which one was about to cry after this photo?
HINT: it wasn't me, although I may have been close as well


So that's what we've been up to!

Hope you're finding some special moments this Christmas season. 

***

Tuesday, December 4, 2012

Hanging pictures properly {How to:}

My husband is a genius. 

And he totally gets the credit for this ENTIRE post.

I used to constantly nag him about hanging stuff up on our walls. Pictures, clocks, wall art, you name it. This nagging was mostly b/c (1) I had used a hammer and nail ONE time by myself to hang something and totally destroyed a good portion of our wall, which Greg had to spend a whole evening repairing, and (2) I had tried another time to drill a screw straight into the wall which resulted in lots of chipped plaster and paint, which Greg also had to repair...and (3) I just plain didn't know there was any other way to hang stuff!

This post is not rocket science. But it may be juuuuust enough knowledge to save a nagging wife out there like me!


Thus, I give you today's tutorial....


 Today's example is on paneling but this technique works on both drywall and paneling.

I should also mention this is for relatively light-weight wall hangings. I wouldn't use this method to hang a giant mirror. You'll need something more heavy duty for that project!


Anyway...


See the difference??  

You don't want to see what it looks like when you try to take that screw out either. Poor little wall.


Okay, so here are 6 super easy steps to easily hang your pics while ALSO treating your walls with some dignity...


Step 1: Find your power drill and make sure it's fully charged!

Step 2: Use a drill bit that is slightly wider than the width of your nail.

Step 3: Drill your hole! (Make sure to drill in the total length of your nail)

Step 4: The nail should easily slide in!

Step 5: Make sure there's enough nail sticking out to hang your pic.

Step 6: Hang away!


Easy right?!

Like I said, not at ALL rocket science.

But you can bet that I hang almost everything around here these days! 


It sure makes for faster projects and a whole lot less nagging too.

Win-win in my book.

:)

***

Saturday, December 1, 2012

A beachy little Christmas {home tour}

Welcome friend. 

Feel free to turn up some tunes during your visit.


And come on in...


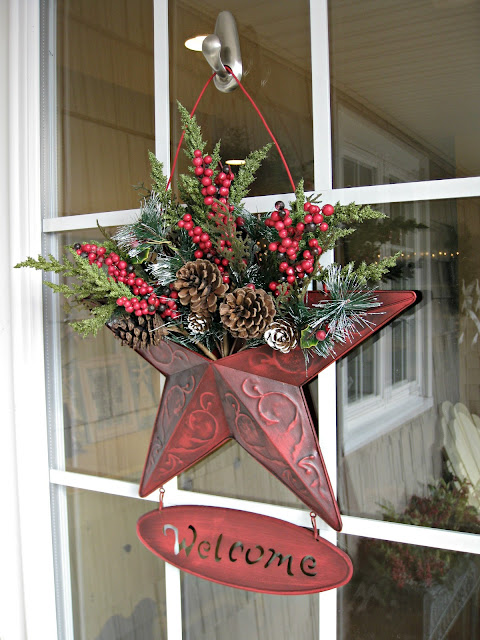
It may look like a traditional red and green holiday from the front porch but there's a beachy little Christmas awaiting you...


So grab a hot cup of cocoa to warm your cold self up and enjoy the tour!


{If you'd rather not scroll all the way down, you can click on the first picture and view it as a slideshow instead.}


Advent calender purchased HERE. I'm especially excited as this one comes with a scripture reading plan for each day.


Don't forget to kiss that special someone today!

***

Thanks for visiting this years home tour. I'm so glad you stopped by. You forced me to clean my house. 

So really. 

Thank YOU.


***

Wednesday, November 28, 2012

Busy Bag Swap

I'm fairly new to this whole "busy bag" craze. Heard of it?

Here's a quick summary...

Busy Bags are basically a simple educational/learning activity for small children (ages 1-6 or 7) that will keep them busy for short periods of time when they otherwise might be antsy. All the different parts and pieces of the activity usually fit into a gallon size zippered bag… so that’s why they’re called “Busy Bags”.
Original content from Simple Organized Living


So what's a busy bag swap?


Basically, a bunch of mamas who all want A LOT of different busy bags but don't want to make them all! Kind of like a cookie swap or a meal swap, etc... Each person makes the SAME busy bag for the number of people that are participating in the swap. Make sense?

Well, I just got back from my swap tonight and BOY am I excited! I should also mention our target age range was from 18 months to 3 years old. And I gotta give a shout out to my friend Mary for organizing this swap...she did such a great job.

Check out all these fun activities that will entertain my kids for hours and hours and HOURS!!!


1. "I spy" bottle. Match the item in the bottle to the picture on the card. Great for car rides.

2. Colored pasta beads for sorting and making a necklace.

3. Caterpillar color matching and learning about patterns.

4. Clothesline with foam clothes.

5. Life size board game. (Hard to picture but the directions look really fun!)

6. Color match the clothespins to the teddy bears.

7. Build a face. (I made this one)

8. Build a cupcake.

9. Plastic sheets to create fun things using playdough.

10. Build a rainbow.


You can be as creative or simple as you like!

So put your boring crayons and coloring books away and have your own busy bag swap...you will be so glad you did. (So will your kids). 

***

Monday, November 26, 2012

Fireplace {whitewash makeover}


Do you ever get a really good idea for a project and then put it off?

For like TWO YEARS? 
(purely hypothetical of course)

You have all the supplies you need sitting around...then after about two years (let's say) you put the kids to bed one night and decide it's finally time to do it?

And after seeing this great blog post on exactly how to do it, you think to yourself, "I could do that in about an hour!"

So you quickly change into some grungy paint-stained clothes and get to work.

START TIME: 9:07pm


BEFORE

I used leftover white paint we used to paint the basement walls. 

Filled a plastic cup equal parts paint and water. Stir well.

I then cleaned the bricks with a damp rag and let it dry.

Took a large paint brush and painted about 4 bricks at a time, followed by quickly wiping the excess with a rag. 

One coat was enough for the whitewash look I wanted.


AFTER 

END TIME: 10:11pm


Whitewashed fireplace makeover complete.

Commence the happy dance. 

:)

***